Sunday 29 November 2015

AI in Unity with explanation

AI (short for artificial intelligence) is incredibly important to have in games, as it gives life to the world you've created and adds massive amounts off depth to it. This can range from an enemy being able navigate a level and jump up platforms in order to catch and kill the main character (with a RigidBody component attached in order to simulate Unity's built-in gravity), to NPCs following the player and avoiding ranger as they guide them to safety, one way or another AI is usually implemented into a video game. It even dates back to the beginning of games, as talked about by gaming journalist (Grayson. N, 2015), all of the ghosts in the original over 30 year-old Pac-Man game had their own different 'personalities' and movement patterns for catching the player.

The red ghost would chase them down from behind following Pac-Man throughout the maze, blue would base his actions on the red one as he moved to areas that would corner Pac-Man as he was being chased by red, next-up is the pink ghost who is the smartest (with her trying to think ahead and predict where the player might be), and lastly is orange who is designed to do their own thing wander about, and sometimes choose to not even attack the player, in order to really make these enemy ghosts seem more like actual characters that can shine through the game's retro graphics than just being all the same.

Pac-Man Ghosts Are Smarter Than You Think
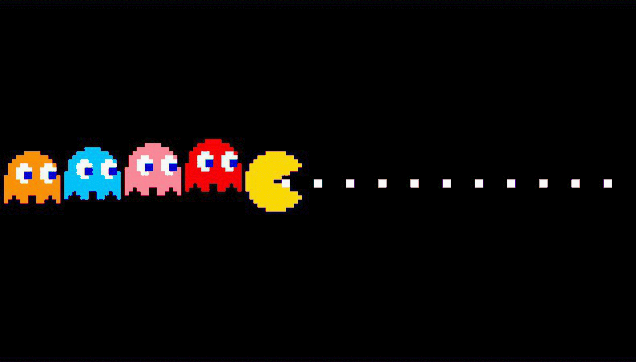
All four Pac-Man Ghosts from the original game, where each had their own strategies of chasing the player. (Grayson. N, 2015)
Now we have some examples let's go back to AI in Unity! For example a common type of AI used is Fuzzy Logic. Which is, (as supported by (WhatIs, 2015)logic that identifies and works out more than just basic calculations, such as if something is true or false. With fuzzy logic statements and opinions can be shown to have either have a chance of either being correct or incorrect or happening or not happening. For example, saying ‘it may rain today’, could be 100% true if there are thick dark clouds directly above you with thunder roaring in the distance, 70% true if there are a lot of clouds around, 50% true if it's foggy with a few clouds and 0% true if it’s bright and sunny without a cloud in the sky. Fuzzy logic is very useful when used in game engines, especially with artificial intelligence. As NPC enemies can use it work out where the player will go or allies can calculate whether or not they should heal you or wait until you’re more injured. Here's an extract of code for making decisions when giving chase, taken from a an enemy AI script (from the official (Unity3d.com, 2015) page) from that depicts a patrolling enemy that wanders about in a set direction, and chases the player if they're spotted, but if the player leaves their line of sight for a certain amount of time, then they'll reset their position and start patrolling again. This is the decision making process:

' void Chasing ()
    {
        // Create a vector from the enemy to the last sighting of the player.
        Vector3 sightingDeltaPos = enemySight.personalLastSighting - transform.position;
        
        // If the the last personal sighting of the player is not close...
        if(sightingDeltaPos.sqrMagnitude > 4f)
            // ... set the destination for the NavMeshAgent to the last personal sighting of the player.
            nav.destination = enemySight.personalLastSighting;
        
        // Set the appropriate speed for the NavMeshAgent.
        nav.speed = chaseSpeed;
        
        // If near the last personal sighting...
        if(nav.remainingDistance < nav.stoppingDistance)
        {
            // ... increment the timer.
            chaseTimer += Time.deltaTime;
            
            // If the timer exceeds the wait time...
            if(chaseTimer >= chaseWaitTime)
            {
                // ... reset last global sighting, the last personal sighting and the timer.
                lastPlayerSighting.position = lastPlayerSighting.resetPosition;
                enemySight.personalLastSighting = lastPlayerSighting.resetPosition;
                chaseTimer = 0f;
            } 
        }

Next I will talk about behaviours and neural nets. Behaviours, as sourced from (Simpson.C, 2014)Behaviours is essentially how AI works. It is sorted through behaviour trees (a high-end graphic modelling language) to model and represent the AI in games. For example different in- game entities in Unity can have different behaviours depending on the situation, such as being idle, patrol, follow, flee, seek, attack, defend, hurt, change, heal, help and dead. A behaviour tree is a tier list that lists nodes in order of importance that decide how an AI entity (such as an NPC) make decisions. The very bottom of the tree (symbolising the leaves) are the actual commands that decide what the NPC does and the branches are different types of nodes that determine how the tree’s AI walks down the tree’s branches to reach the commands of which is best suited to what is happening in-game. An example of a behaviour tree is below.
An example behaviour tree represented how the decisions are filtered down to different 'leaves'. (Simpson. C, 2014)

Now onto neutral nets! Which is more of a theory than an implementation of AI. Once again, with information from (TutorialsPoint b, 2015)Neural nets is the theory of AI almost being human,  especially in the future. Where AI will almost become  human such as copying the pulses in the brain and how  it uses these pulses to tell our bodies commands. Nobody knows exactly what it is, however it tries to simulate how the brain works and emulate the human mind using very advanced technology that learns new things that it experiences throughout its time.

Damage in Unity

Damage is critically important to a variety of games, and can be applied to many different situations using C# in Unity depending on the player's need. Some games have the player get hurt by bumping into an enemy, others have them get injured when falling from a high enough place. I will explain how someone can implement code that causes damage below:

Damage usually works hand in hand with collision detection, as when the two hitboxes collide it triggers the code to activate. Having your health as a numerical value which can rise and deplete in-game is as simple as creating a public float variable. Here's an example of code used to store health in a player, and a copy of it is placed inside every instance of an enemy (as posted by (ankit.tiks007, 2015) from Unity answers): "
  1. public static float health = 100;
  2. void OnCollisionEnter(Collision col){
  3. if(col.gameObject.name == "Player"){
  4. health-=5;
  5. }
"
Essentially all the code listed above does is when an enemy, which contains said code, collides with the player character, it reduces 5 from their maximum pool of 100 health. Using the health value, various tasks could then be coded in more depth, such as destroying the character when the health reaches 0, knocking them back upon the collision to show force, or creating a duplicate of the enemy code I listed that's designed to be inside healing items instead, where it raises the player's health by 5 instead of reducing it to add another layer of skill to the game.

Tuesday 24 November 2015

Ray Tracing

Ray Tracing is a type of collision detection used in Unity, that is commonly used in various entities like AI enemies. Basically when something is raytracing it's separate from the collision box around it, but instead of having a box around it the object is casting an invisible line forward in any direction, that activates when something hits it. This can range from an enemy walking around, casting a ray on the floor so that it doesn't fall off a ledge, to using a raycast to look around the world to try and spot the player, and when the player comes into contact with the beam the enemy gives chase.

As helped by (RayCast, 2015), from the official Unity website. Here is some code that can be used for Raytracing and I'll explain how it works: "using UnityEngine;
using System.Collections;

public class ExampleClass : MonoBehaviour {
    void Update() {
        Vector3 fwd = transform.TransformDirection(Vector3.forward);
        if (Physics.Raycast(transform.position, fwd, 10)) {
            print("There is something in front of the object!");
        }
    } 
}"

This is a simple C# script that will cast a ray, and it'll be able to detect all of the other colliders in your Unity game scene. So when two colliders hit each other they will both trigger a reaction depending on what you want your program to happen. Also as a side note, if the object emitting the raycast already has a collider attached to it, the ray will not interact with it when it is spawned.

Here's a basic diagram showing how raytracing works, made by me:

Working with Sound

Sound is a commonly overlooked aspect of game design that can help immerse a player in the world, become iconic to a certain scenario (like collecting an item) or alert the player to some danger. So today I will be looking at how sound can be implemented into Unity such is importing audio files, playing sound, making sound dynamic, triggering sound to play and manipulating volume.

With my facts supported by the official Unity website (Unity3d, 2015), firstly, importing any assets into Unity. It's a simply drag and drop affair from your PC's desktop into your project's content window, or by clicking 'Assets' at the top of the screen, then 'Import Assets'. However make sure your sound file is has a .wave, .aif, .mp3 or .off file extension for it to be compatible! When your audio is finally inside Unity, it will be replace by an 'Audio Clip' file (Docs.unity3d.com, 2015), which basically holds all the original sound data that you imported, with it being something an Audio Source object would use.
My own screenshot of the toolbar option in Unity


Now we have playing sound, which as taken from (Docs.unity3d, 2015), you can use the simple line of code "public void Play(ulong delay = 0);" in C#. All it does is plays your sound after the specified delay, so in this case the sound will play instantly as the delay is set to 0 seconds! Here's an example of code from the same source giving the programmer specific control over the playing of their sound: "using UnityEngine;
using System.Collections;

[RequireComponent(typeof(AudioSource))]
public class ExampleClass : MonoBehaviour {
    void Start() {
        AudioSource audio = GetComponent<AudioSource>();
        audio.Play();
        audio.Play(44100);
    } 
}"

Next is triggering the sound, where if you remember back to when I talked about collision that's one of the ways sound can be implemented here too. This can be performed by a simple trigger box and collision method, as sourced by (aldonaletto, 2015), from the Unity help forums (and not the official Unity blog). All you have to do is create a trigger volume that the player can collide with, then using this function code it will trigger the sound to play once: "
  1. function OnTriggerEnter(other: Collider){
  2. if (!audio.isPlaying){
  3. audio.Play();
  4. }
  5. }
" Following on from triggers, and triggering something from sound being played over collisions, you can also use an Audio Listener, (AudioListener, 2015), which works on a similar level to a built-in microphone inside Unity. Essentially any sort of audio input from the Audio Source will be able to set it off, playing the sound from the computer's speakers or headphones, and all you have to do is add the Listener into the game for it to work.

Now onto creating the sound dynamically, this can even be something as simple as playing sound from either the left or right speaker to make a game feel more immersive. It essentially means to play sounds and music in a creative or different way, so maybe play music inside a far-off caravan, enticing the player over to go and see it. Games in Unity should consider using an AudioSource GameObject that's attached to another object in-game, which (with information from (AudioSource, 2015)), is very useful to play background noises in games, and is especially useful when attached to the scene's camera object to help create looping ambient sound effects.

Manipulating volume just means the volume of your sound will be adjusted in your game, so a quiet whisper in a hedge will have a pretty low int value in your code, whereas a spooky jumpscare to freak out the player will set it abnormally high. This can be implemented by code, as used by (Kryptos, 2015) from Unity Answers. "
  1. // setting volume to zero
  2. audio.volume = 0;
  3. // or mute
  4. audio.mute = true;
" The first line lets you set the volume as loud as you'd like, where the second mutes it (so maybe in a scary game as the monster gets very close you mute the music entirely to get ready for a jumpscare!) These have a variety of uses and applications in Unity. If you'd like to manipulate your sound even further you can use an Audio Mixer (AudioMixer, 2015). Essentially it's a window within Unity that allows you to bled your sounds together, edit-in a variety of various affects to them and even adjust volume levels. All you really need to do is make sure the mixer is outputting to an Audio Source, and you can create a load of new sound effects to use containing within Unity, with you only using the existing ones you have as a base!

The Audio Mixer
A picture of the Audio Mixer tab open in Unity, from (AudioMixer, 2015)


Thursday 19 November 2015

Pointers

A pointer (with information for this starting paragraph sourced from (TutorialsPoint, 2015), is basically a variable that can refer to another separate variable using the value of its address in code. It means you don't have to use the same variable a multitude of times throughout the code for different functions. Here is an example: "i.e., a direct address of the memory location. Like any variable or constant, you must declare a pointer before using it to store any variable address." 


#include <stdio.h>

int main () {

   int  var1;
   char var2[10];

   printf("Address of var1 variable: %x\n", &var1  );
   printf("Address of var2 variable: %x\n", &var2  );

   return 0;
}

The above code exists in order to print the address values of the variables in your code. And afterwards when you compile said code it will produce this in the console:

Address of var1 variable: bff5a400
Address of var2 variable: bff5a3f6


As extra information gathered by the C programming book by (Richard.R, 2013.), meaning it's a very reliable source since it was written by an official published author, Pointers can help make your code much shorter and more compact, meaning that the compiler has less code to process and thus the program will run more efficiently. When using C# any programmer should consider using these, as down the line with hundreds of thousands of lines of code n your game they can work very well for optimization of your creation, and will allow to run on lower-end hardware, and thus you'll be following a more professional working standard. 


Tuesday 17 November 2015

Destroying an Object in Unity

Whether or not you want an enemy to vanish when the player kills them, or have a summoned weapon projectile disappear after they've spawned and done the job, destroying objects in one way or another is something that is done very frequently in games.

As provided by (IgorAherne, 2015) from Unity Answers (an official Unity forum that may not be a 100% credible source): the character you want to die and object you want to kill the player will both need colliders attached to them, ensuring the 'is trigger' option is not enabled in the settings for the player, while it is checked for the enemy. And as sourced by (HarshadK, 2015), another Unity answers page, the "
  1. Destroy(gameObject);
" command is very useful as if the player wants to kill the enemy, that line of code will make them disappear. And: "
  1. using UnityEngine;
  2. using System.Collections;
  3. public class Collision : MonoBehaviour {
  4. void OnCollisionEnter2D(Collision2D coll) {
  5. if (coll.gameObject.tag == "Lava")
  6. Destroy(gameObject);
  7. }
  8. }
" Is example code from (HarshadK, 2015), for killing and despawning a player when it collides with an object called lava. This is how a player can register a collision and cause them to die, thus making them start over. This is very important for a game to have, as without player death a video game would just become far too easy and lack any sort of challenge or competition!

Thursday 12 November 2015

Adam’s Unreal 4 tutorial for a simple lift:

Okay! To start-off: Create a new UE4 project with the 3rd person view.
Create a new blueprint -> actor class and call it Elevator.
Add a new component at the top-left of the screen called StaticMesh.
Then choose a model for the static mesh at the right-hand side. Select ‘Shape_Cube’.
Set the scale axis (above the static mesh selector) for X and Y to 3.0, but then set the scale of Z to 0.1.
Compile, save, then head back to the tab of your main project.


Box collision setup:
Drag in your brand- new lift into your gameworld. By now you should have a flat square box in your game, if you play you will see your character step up onto it so we know the collision is working fine.
Now switch back into your Elevator blueprint and add another component, this time a box collision!
Go into your collision details like before and scale it 4.0 X, by 4.0 Y, by 1.0 Z. And then shift it up a bit with the move tool so none of the box collision is poking beneath your lift.
Now scroll down to ‘Collision Presets’ in the details tab still, click the dropdown menu and set it to Custom. Now, click the small arrow to the left of the box pointing right, and then scroll down ticking ignore for every object type EXCEPT pawn, leave that checked for overlap. We do this because we don’t want a random crate that’s blown away for example landing on the lift and triggering it to move.
Now scroll down and click the green box with a white + in the middle of it next to on component begin overlap. This takes you to a new window for some programming.


Blueprints:
In the event graph right-click besides event begin play and search for ‘Get Actor Location’ (don’t join these up). Now right click the yellow return value and select ‘Promote to Variable’.
Now join Event BeginPlay to the left of your new Set blueprint node.
Click the Set node and at the right name it to ‘IL’ (short for Initial Location).
Move down to the ‘On Component Begin Overlap’ blueprint node that’s already made at the bottom (or right-click and make a new one if it’s not there). Now drag a line out from other actor section and select ‘Cast To ThirdPersonCharacter’.
Now drag in your Box component at the top-left of your screen, then drag away to link up a node and select ‘Destroy Component’. This is to make it a one-time lift that takes the player higher without it needing to be used again in the level.
Now link the top-right arrow of Cast To ThirdPersonCharacter to the left of DestroyComponent. Now we will move on to something new: Timelines!


Timelines:
Right click the screen and select ‘Add a Timeline’. Then link DestroyComponent to the play from start. Section.
Double-click your timeline to open a separate window, basically we’ll be animating the lift to move up in this timeline when the player steps on it and collides with the collision box.
Click the V+ button to the right of F+ and left of i+ at the top of your viewport to add a vector track.
Set the length to 2 and then below that toolbar click the open padlock next to the red and green X and Y to ‘lock’ them and stop the lift moving in those directions, since we only want it to move up! This is important!
Hold shift and double-click anywhere in the box and set the time pop-up that appears to 0, and press enter. Now do the same thing and shift-click to create another point, this time setting the time to 2 (just the exact length of our animation) and setting the value to whatever you like (this will affect the distance your lift moves, higher values moving faster. I suggest you set it to 1000). The two dots should connect in a diagonal line like shown below.
Compile, save and go back to your Event Graph.
Vector Tracks:
Now we have our timeline done drag away from the yellow ‘New Track 0’ node we just made in the Timeline blueprint and select ‘Vector + Vector’.
Now drag in the IL variable we made earlier, select ‘Get’ and connect it to the bottom-left of the newly made Vector + Vector node.
Now in your Timeline_0 blueprint, drag away from the update arrow at the top-right and enter ‘SetActorLocation’. Now drag away from the left of this newly-made blueprint under the yellow ‘New Location’ and connect it to the right of your Vector + Vector node.


Results:

Compile and save, then switch back to the viewport of your main game and give it a play. If you move your character on-top of the lift and did everything correctly you should fly right up! Congratulations!

Types of errors in C#

Normally without error correction software, if you ever made a mistake when typing your code, even a tiny one, when it's all compiled up and the game is played it just wouldn't work as intended! Potentially, finding and dealing with the problem without any sort of guide as to what's causing it would be a nightmare. This is where debugging tools come in, which help users identify the issues in code once they start to have varying levels of complexity inside with all sorts of variables and methods! First I will now explain, thanks to (Csharp.net-tutorials, 2015), the easiest way of debugging in C#:

Debugging is essential to every programmer, and as such is compulsory for anyone to learn. Print Debugging is a type of Debugging of the most simple form, that even though beginners will take to the most, veterans still use years later. Essentially all it does is make your code print your variables, numbers, text statements, etc when it starts, which helps the user see how far through the code has been run before an error occurred and broke it. The method to use this in Unity/C# is simply 'Console.Write()' and it allows you to post all of your inner-workings of other methods and variables straight to your console window for easy analysis later on!

One more method of debugging is using a Try-Catch Block. A quote from (Msdn.microsoft e, 2015), "The try-catch statement consists of a try block followed by one or more catch clauses, which specify handlers for different exceptions." They work really well for looking for catch statements when an exception appears, and if the method that's currently running doesn't have a catch block present, it will go up the hierarchy to find a parent method that does. Eventually if there isn't a catch block, then there will be an error message listing an 'unhandled exception' and the software will cease to function. On the other hand the 'Try' section of of the 'Try-Catch Block' holds the defended code that could start the exception message, and the block will be continually run until an exception appears.

Here's an example from the above source, used for declaring variables with a Try-Catch Block:

static void Main() 
{
    int n;
    try 
    {
        // Do not initialize this variable here.
        n = 123;
    }
    catch
    {
    }
    // Error: Use of unassigned local variable 'n'.
    Console.Write(n);
}

There are various types of errors in Unity, and I will list them now with a description too! (All sourced reliably from the official Microsoft website (Msdn.microsoft d, 2015)) Firstly we have Syntax Errors, which as quoted by Microsoft "Syntax errors are those that appear while you write code.", which means that anything invalid you type down whilst coding will appear in real time. These can even be as small as grammar errors (like not using a capital letter for an instance name, since it could be referring to an different object entirely.) Syntax errors are the most common type, and are completely due to human error and making a mistake. Software like Visual Basic can check your code in real-time and alert you to any errors present.

Next-up we have Run-Time Errors! These only arise once you've started playing a game, and can be considered as a bug or glitch at the Syntax Error system never detected. It's essentially an unexpected occurrence in your game that doesn't function like you coded when a game is booting. There are tonnes of examples, like maybe an enemy not appearing, or the score showing a fault line of text when the game boots up. There's no solve-all fix for this, and involves a more trial and error process of finding the culprit code and amending it accordingly.

Finally there are Logic Errors. These have a clue in the name, but a Logic Error as a problem or glitch in the game as it's being played that the programmer never accounted for, and thus the game behaves unexpectedly to the programmer, even though the code could have been correctly programmed to do the 'wrong' task. These range from the main character being able to jump in the air continuously forever if they hold down the jump key, or maybe when the player finishes the level they end up spawning at another level, rather than the next one in the order they're supposed to be in. Again like run-time errors they're tough to fix, but in this case they're even tougher since they could happen any time in a game under a huge number of possible scenarios, without a clear reason why they're happening (unlike Run-Time Errors which are guaranteed to happen at the start).

There is also white box testing (something I will create for my own game prototype), which involves creating a test-log (inside a chart) for various Scripts and Functions in your code, as you test each game mechanic of your game for bugs and functionality. (An example will be the one I create for my project.)

Programming game document and planning with UML diagrams

The game is a 2d-sidescroller set in a floating desert and jungle, hovering in the sky above the clouds. With Dinosaurs invading the land, kidnapping the wildlife and dropping them off in a nearby desert with their flying airships, you play as a small, lost bird trying to get back home by navigating floating obstacles like floating islands and platforms, and all the while avoiding invading dinosaurs trying to conquer your home. It will have a 2d and cartoony artstyle with a mix of pixel-art and cell-shaded graphics, using an animated animated character, with friendly animals like frogs and toucans (sprites are either made by me in Photoshop or sourced royalty-free from Open Game Art).

The main character is a bird, and you can move left and right, jump and use other abilities if I have time to implement them (like rolling for a forward speed boost and picking/throwing objects). Enemies will also be about, and will kill you if you are hit by their fireballs/attacks, and you’ll have to jump on and over their head (as the platformer game is more focused on stealth over fighting, so the bird must avoid enemies to survive, or the bird can roll into them and stun the enemy for a short time if I have enough time to implement it). You must navigate to the end of the level and reach the exit, which upon doing so will take you to the next one.

If there is time extra content will be added, like basic collectables that increase you score when collided with and variations of enemies (like ones with wings that float) and even local multiplaer with various characters on the screen. The controls of the player will be moving left and right with the A and D keys on the keyboard and pressing Spacebar to jump. The win condition will be to reach the end of each level and go through the door to the next, while also racking up as many points as possible with the various collectables scattered about.

A draft image of what the main bird character may look like, made by me! The later character will be created in a pixel art style.


The game will have a targeted release for PCs, since they’re commonly used platforms aspiring developers use to make their first games, which are a very open platform and easiest to develop games for (since consoles require you to buy a very expensive development kit from the company who owns it). It also allows a huge amount of people to play the game without leaving out too many people, since almost everyone who plays games owns a computer of some sort, with a presumably tiny demographic owning just a games console, most people will be able to play this game regardless of me leaving out dedicated gaming machines since it’ll be something they can quickly download online.


UML diagrams/ planning:

Also to plan out how my code is going to work before I begin programming, I created three UML diagrams (which are shown below, there are two sequence diagrams showing both a win and lose condition with how the game will flow/ be structured, and a class diagram to show different classes, states and datatypes). My previous research into planning documentation and various types of UML diagrams helped a lot to create these, however I chose to go with Sequence and Class diagrams in the end as I felt those were the most appropriate for my game, especially being in the platformer genre. These UML diagrams cover a lot of aspects of what the game may be like, ranging from the basic mechanics of the game, to the score and to how the camera moves. This is an example of me following professional working practises, since I will be able to start coding in C# with unity with a clear idea of what I'm aiming to achieve and with a strong visual representation of the my potential code's core structure.

Larger size of the image available here (uploaded by me due to Blogger image size limits): http://postimg.org/image/qm8oli5tn/


Larger size of the image available here: http://postimg.org/image/amhrizpjd/
Larger size of the image available here: http://postimg.org/image/z9zuwey6v/